Which LeveLok® KeyLok® Ladder Leveler is For Me?
As an Amazon Associate this site may earn from qualifying purchases made through the suggested links below.
I was researching a ladder leveler and found this one to be popular, well-designed, and fairly priced.
The problem is it's very confusing as to what's included in different packages and why there are different part numbers for different ladder brands.
Please know that the reason for this post was that it took me about an hour to digest all the differences. I wanted to save people time by explaining everything. As a secondary motivation, I'm also including links to various ladder leveler products on Amazon. If you end up purchasing anything from there then I'll be rewarded with a small thank you fee. It costs you nothing. Note, Amazon will not always be the cheapest price, so shop around. I actually got mine at Lowe's with a coupon.
It's All The Same
The confusion is that the manufacturer white-labels their design and the ladder companies use totally different part numbers for the exact same thing. Then, some retailers only sell the leveler to go along with their preferred ladder brands.
As stated on the LeveLok® (note, it's not spelled LevelLock) website, ALL of the KeyLok® leveler parts that look the same are actually the same. Their website explicitly says the system can work with some ladders by Werner®, Louisville®, Keller®, Rhino®, and Gorilla®.
I ended up installing a Werner® branded product on my Keller® ladder.
Make Sure It Will Work With You Ladder
Disclaimer: If you're not sure then don't press your luck since you can obviously fall and damage or kill yourself. I'm not an expert in this area so the information here is only intended to help you understand the product and know what questions to ask.
This leveler system previously was not approved for step ladders, but the LevelLok® received approval for step ladders in 2016. Step stools are still excluded.
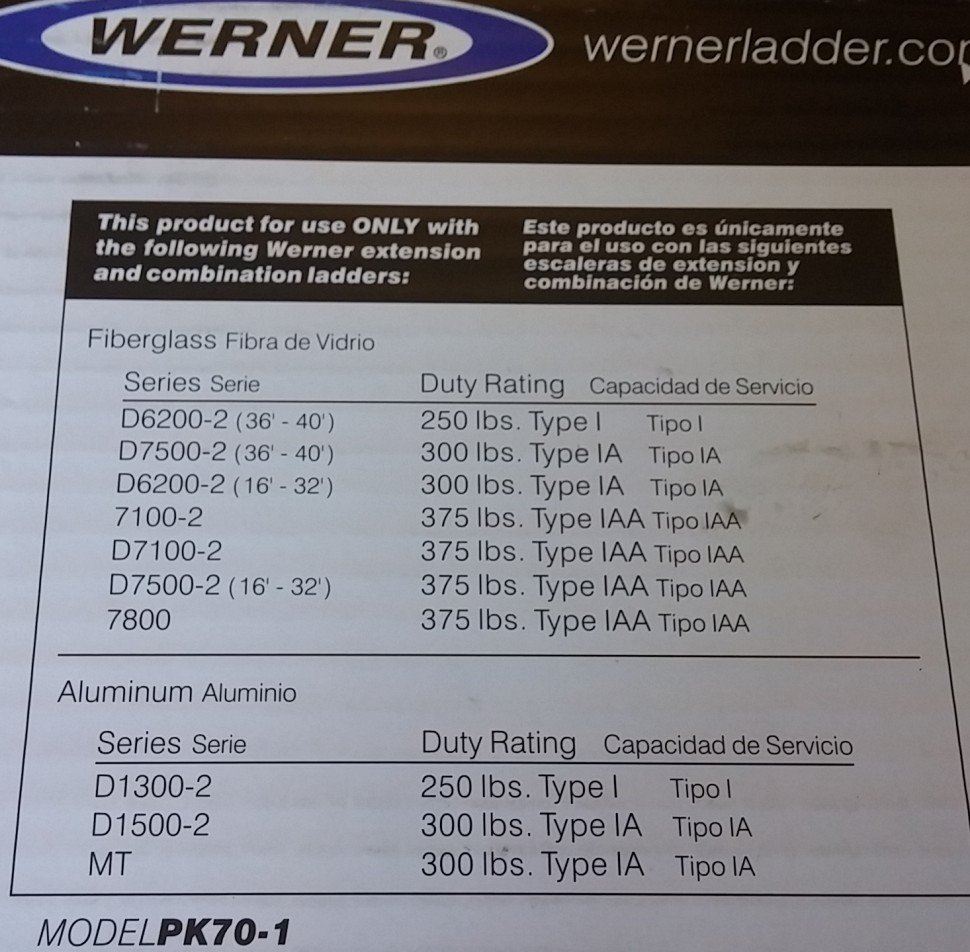
It also previously was not approved for Type II (225 lb.) or Type III (200 lb.) extension ladders, but the manufacturer's website now says it is qualified "on ladders up to and including a Type 1AA, 375 pound duty rating". The installation instructions on the website go on to say this can bed used with "aluminum, fiberglass and wood ladders". Again, you'll want to confirm your specific ladder at the time of purchase and with the manufacturer's provided instructions.
Your ladder should have a sticker with the "type" and weight rating. Examples of ladder types which typically work include extension, straight, articulating (like Werner MT or Little Giant®), combination, sectional ladders and step ladders with the following ratings:
- Type III (200 lb.)
- Type II (225 lb.)
- Type I (250 lb.)
- Type IA (300 lb.)
- Type IAA (375 lb.)
Places you might look to find if your model works, include:
- The LeveLok® "Product Description" section
- The videos under the "Installation" tab
- Contact the manufacturer
- On the back of the branded boxes (assuming you're in the store or that it's shown in listing photos)
- On retailer websites like Amazon, Home Depot, Lowe's, etc
- You may find unofficial information in Q&A and review sections on some retailers. Use with caution.
How The System Works
See the directions for full details.
Here's a summary to give a rough idea.
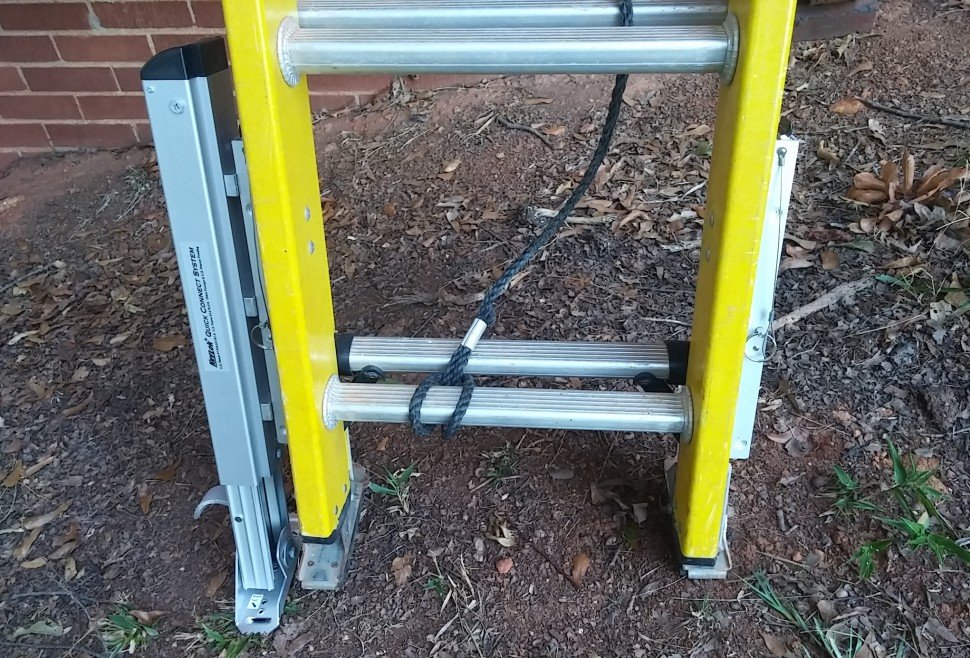
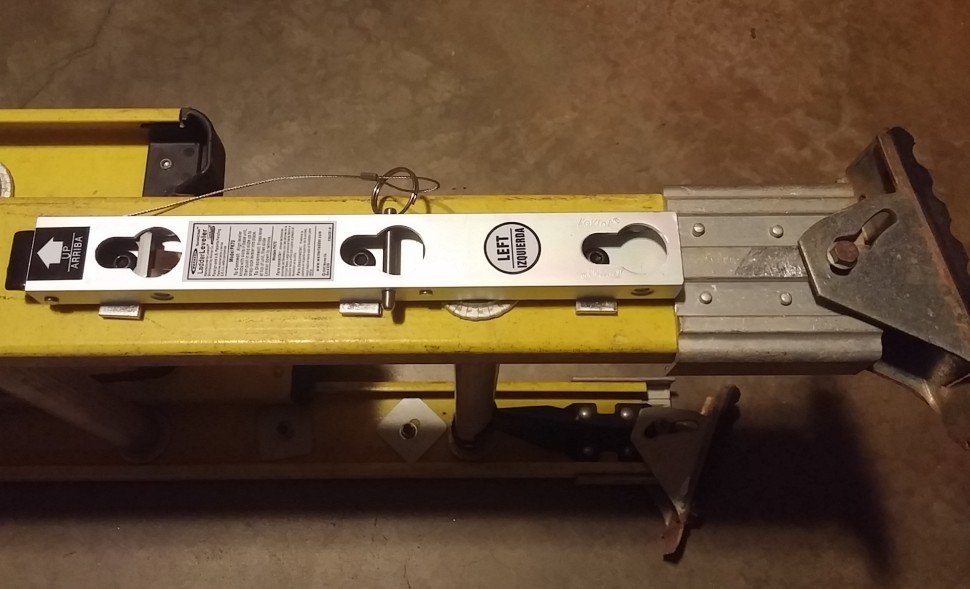
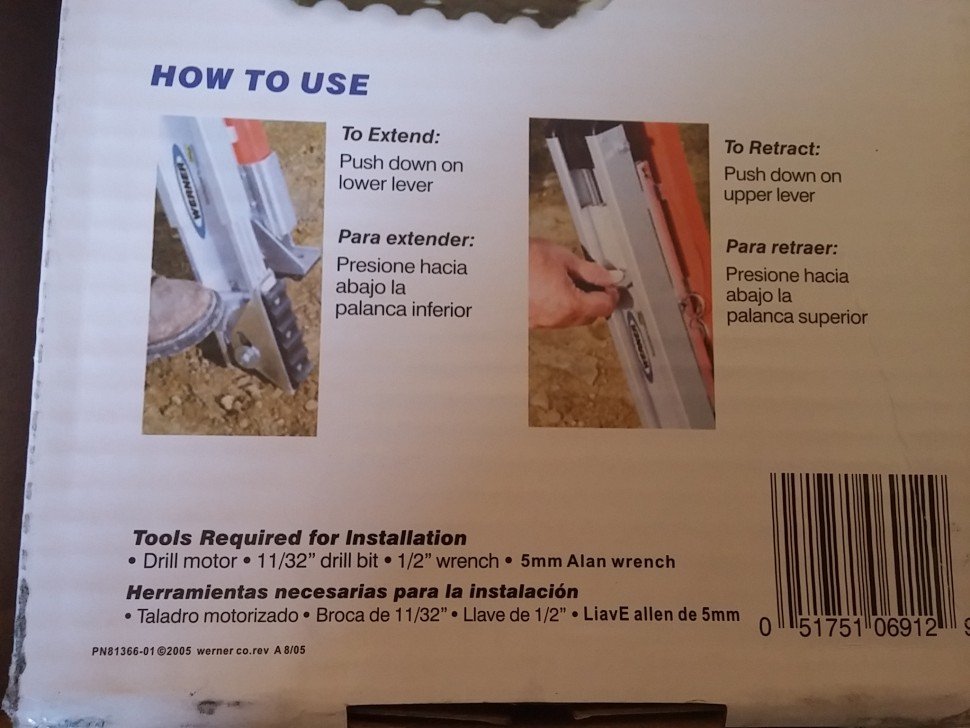
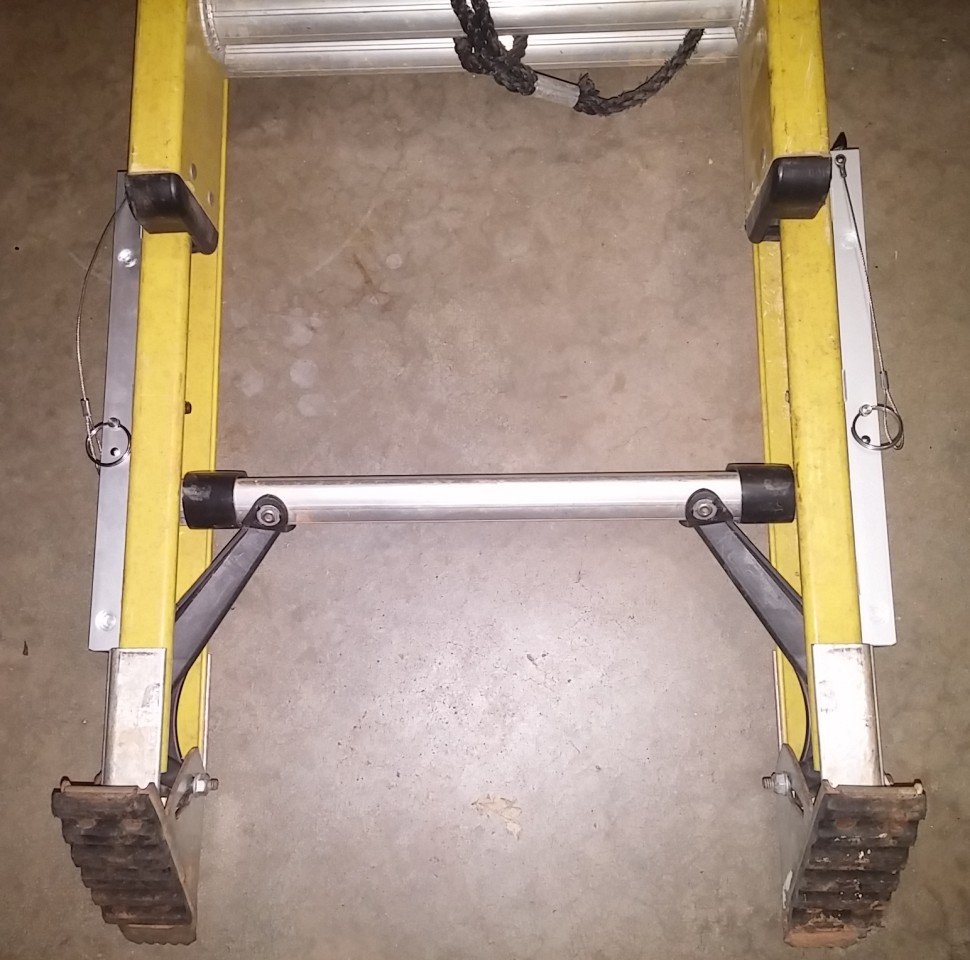
You drill through both sides of your ladder's rails (see instructions) and attach a quick-disconnect base bracket to each side. The one extendable leveler snaps securely into the bracket (there's also a safety pin) based on which side you need to level. The other side of the ladder uses its normal foot. If you need to change sides then you'd remove the leveler from the base bracket and move it to the other side. If you're not using the leveler then it can be retracted up and out of the way, or simply removed.
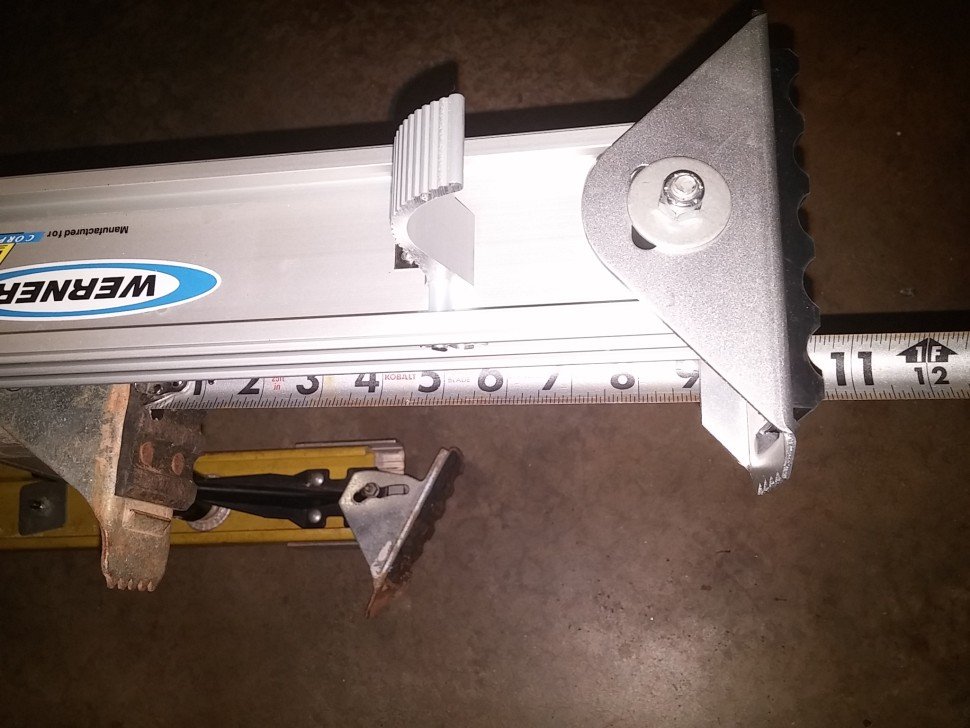
The leveler part has quick adjustment and release mechanisms. It only takes a few seconds go adjust up (hold with foot, press release, and a spring pulls it up) or down (just push with your foot). It can extend roughly 10 inches past the fixed foot position..
The Full Kit
For most people a full kit is the desired product. It includes:
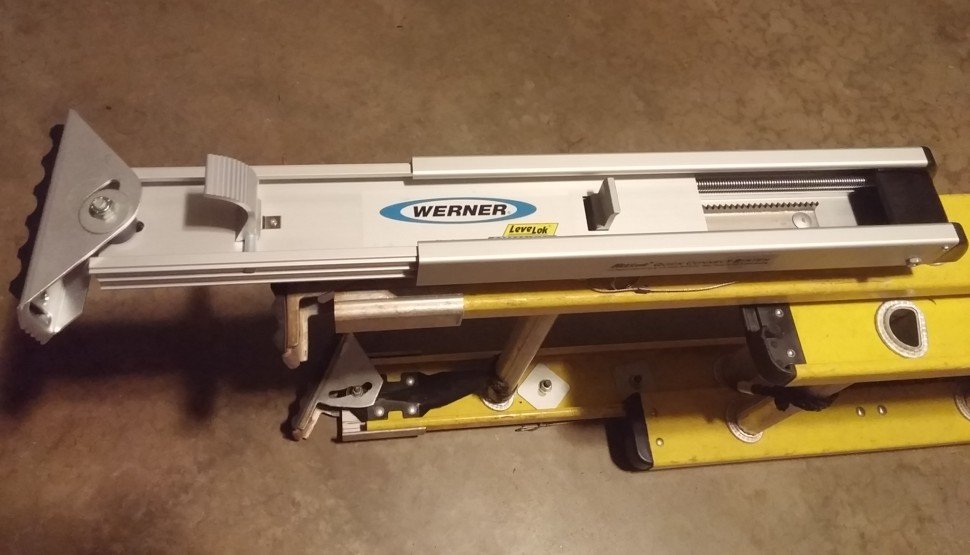
- (1) detachable leveler (the part which extends and retracts)
- (2) KeyLock quick-disconnect base brackets (the part which permanently bolts to both sides of the ladder)
- installation hardware and instructions
The following full kits are all the same, except perhaps the stickers are different colors and reference a white-labeled brand. Also, the back of each "branded" box should include models for that brand. If you appreciate my effort on this article, then clicking and purchasing through one of these links will reward me a small amount.
- LeveLok® LL-STB-2QC
- Werner® PK70-1
- Louisville® LP-2220-01
- Also, sold as the Keller® AK020, Rhino® GLL-01, Gorilla® GLL-01

Kit with Only the Base Brackets w/ Quick-connect
You would only want to buy the following base bracket kit if you had a second ladder and you wanted to make it capable of also using the leveler.
This is a pair of base units, one for each side of the ladder. You still need a "leveler" to attach to lock into these brackets on 1 side.
Again, the following base brackets are all the same, except perhaps the stickers are different colors and the white-labeled brand.
- LeveLok® LL-QC-1
- Werner® PK70-2
- Louisville® LP-2220-03
- Also sold as Gorilla® GLL-02
The Leveler By Itself
I'm not sure why you'd want to buy just the "leveler" part by itself, unless you lost or broke your leveler. Or, perhaps if you accidentally purchased just the receiving base and needed to complete the set. Technically, you could put a leveler on both sides of a ladder and not have to ever unlock them, but you only need one.
In any case, here are the part numbers for just one leveler. The following leveler part #'s are all the same except for the stickers.
- LeveLok® LL-STB-1QC
- Werner® PK70-3
- Louisville® LP-2220-02
- Also sold as the Gorilla GLL-03
Permanently Mounted Leveler Kits
You probably don't want any of the following permanent kits, but it's an option. This kit gets screwed directly into certain ladders and has no base brackets, so you can't remove the levelers. There are actually two levelers in this kit (as opposed to 1 in the regular "full" kit).
The rail thickness matters, so see the LeveLok® permanent mount page for details before considering one of these kits.
- LL-STB-1AL
- LL-STB-1SL
- LL-STB-1XLB
Replacement Parts
Levelok® also sells some replacement parts and installation hardware.
Other Photos and Captions


Lovingly crafted by orangecoat with some rights reserved, and a promise not to spam you.
Back to top